 |
|
||||||||||||||||||||||
|
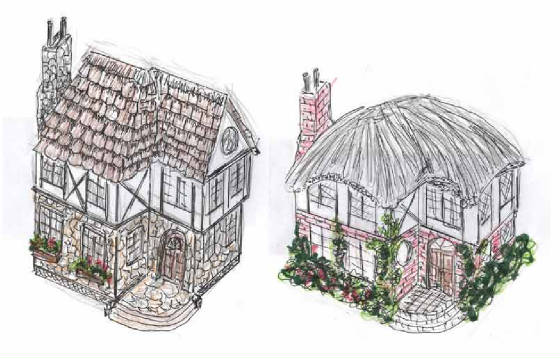
I have tried to build a good deal of flexibility into this project so you may choose to do it as 1 level or 2 levels and there
is also a choice of finishes (brick or stone) roofs (shingle, slate or thatch) and some window treatments. If you are working
on this and something is not clear please contact me privately at goddessofchaos@verizon.net.
MATERIALS:
* Heavy card stock (mat board) I used 1/16th inch thickness and my measurements are based on that. *Light weight card (index weight) or photo printing paper *Good quality builders glue (I used Weldbond which is thick and dries pretty fast) *Spray adhesive or Yes glue for wallpaper *Opt. small print wallpaper *Thin model wood (balsa or basswood, or cedar if you can get it.. *Acetate (Perspex) for windows *Opaque white (or other) pen to do window lights * Thin ply or MDF for base * Sandpaper TOOLS: * A very accurate ruler. Mine is a 6 inch stainless steel that has spaced holes for up to 1/32nd inch measurements. It is also wide enough to give me a nice right angle metal edge to cut against. *Very sharp razor knife - the kind that snap off might be a good thought or have lots of fresh exacto blades. * A magnetic gluing jig is helpful but not necessary. Any kind of right angle jig should work. * Mitre box or other type of mitre cutter. * Optional - brass or other metal strips in various widths for gauges. MicroMark sells a set that is used to space strip wood on your table saw. Any other metal edge will work.
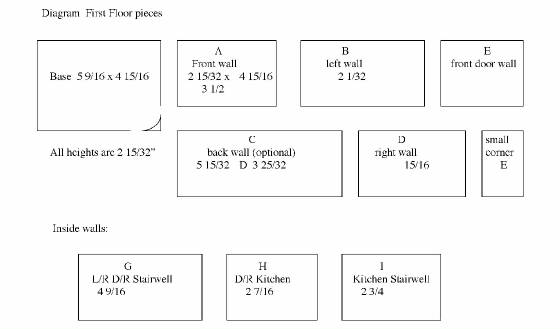
Cut the following pieces:
Base 5 9/16 x 4 15/16 inches All wall heights should be 2 15/32 A - (front wall) 3 1/2 inches B - (left wall) 4 15/16 inches C - (back wall/or omit if you plan to leave one side open) This can also be hinged to open if you wish 5 15/32 inches D - (right wall) 3 25/32 inches E - (Front door wall) 2 1/32 inches (Might need to be trimmed) F - (small inset wall) 15/16 inches Inside walls: G -LR/DR/stairwell 4 9/16 inches H - DR/Kitchen 2 7/16 inches I - Kitchen/stairwell 2 3/4 inches (measurements for upstairs will follow later) Measure and cut all windows and doorways as follows: (these are guidelines - you might want to do something different.) Widest
measurement is at the bottom)
Measure across top and bottom of windows - 7/16 inch from top and 3/4 inch from bottom. Draw lines for tops and bottoms of all windows. You may use my measurements or plan your own window widths) Front wall - 1/2 inch from each side and window opening = 7/8 inch Left wall (add extra window if you omit fireplace) Dry fit all pieces - you can use tape to hold everything together and to the base to be sure of an accurate fit. Make any adjustments necessary at this time. STAIRS (The hardest part)
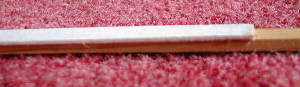
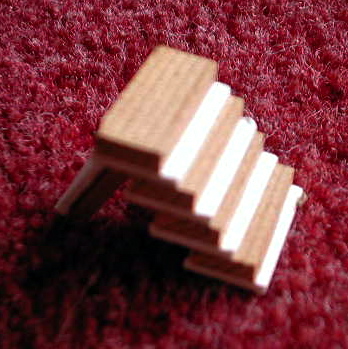
I calculated the height of the stair risers and came up with the following method. If your card is not the same thickness and all your measurements are off even a tiny bit from mine you may have to adjust. At the end of the instructions I will include instructions for calculating your own stairs. Using a strip of wood 5/16 x 1/8, cut a strip of card 11/32 wide and glue it to the wood strip with one edge exactly flush and the other slightly over the edge.
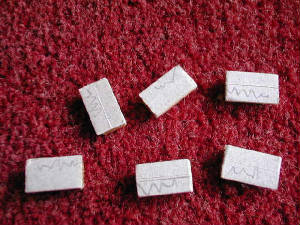
Cut 10 pieces 11/16 wide. I used the fine blade on my mini table saw and set up a stop at the right width so I could cut
each piece accurately. Cut 2 additional pieces 1 1/4 wide for the bottom stairs. Cut one piece of strip wood without card
for the top stair which will butt against the upper floor and another plain piece of strip wood 1/1/4 for the landing.
Using your razor knife edge to mark with (it is more accurate than a pencil) measure 5/32 from the front edge of each step
and draw a light mark. Glue each step with the bare wood edge meeting that line. The top step will be bare.
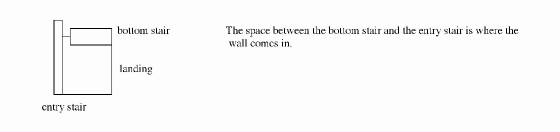
Landing: Cut a piece of card 1 7/32 x 3/4 and glue the shorter width completely across the bottom stair. There will be a
slight overhang. Trim a notch against the bottom stair ending just at the edge of the wood. Glue the bare 1 1/4 strip across
the landing card and even with the edge of the wood of the bottom stair. There should be a slight overhang. (SEE DIAGRAM)
The last two wide steps will be glued to the landing. Lay a piece of card tight against the stair side and up to the notch for spacing, and glue the last two steps so the card fits tightly between the upper and lower steps. If you want the steps curved sand the curve before gluing the stairs together. Breathe a sigh and admire!
Wall Coverings:
If you will be using wallpaper it should be applied to the inside walls at this stage. I used a spray adhesive on the card on the side that will be inside. If you don't want a seam to show at the corner where walls come together, leave a small edge on the paper that can be folded over the butting wall. Inside walls had paper applied to both sides. If you prefer to leave the walls plain or paint them, you may do so. If you paint, be sure to seal the card with a coat of sealer before painting.
Window trim:
These strips will edge all of your windows so you will have to cut quite a few of them. The cut pieces are then glued around
the inside of the window openings with the corners mitered. The outside of the openings will be done later.
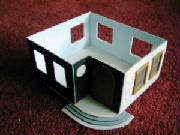
When your walls are finished and your windows trimmed it is time to start gluing the outside walls to the base. Start with
B and glue the bottom edge exactly even with the edge of the base and using your right angle jig let the glue dry. Move to
A and butt the edge to B and to the base and be sure your right angles are accurate. Fold the overhanging wallpaper edge
and apply the glue to the paper as well as to the card joint. Where the paper edge will not be used, cut it flush with the
card.
You will now have to decide if you will have an open back, a removable back, or if you will do as I did and glue the back completely. Since the floor lifts off you will still have access to the rooms and the windows should allow you to see the furnished rooms. Glue piece C now if it will be stationary. It butts against B. Otherwise skip that piece and go on to piece D. D butts against C so if C is made to open it will act as a stop. The last two pieces form the entry corner. Butt the edges so it forms a nice right angle corner.
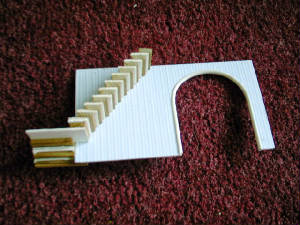
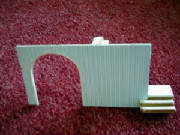
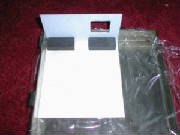
I chose to do a curved front stairway and those pieces are shown added in this photo. After the steps are glued to the base
card you must put a wooden riser around the bottom to bring the level of the base to the level of the stairs. The photo
of the underneath side of the base shows that. There is no set spacing - just whatever seems good to you.
The next lesson will deal with the inner walls and the 2nd floor as well as the outside treatment.
|
|||||||||||||||||||||||||